This post is part of a series of articles on how to setup a Jekyll blog :
- Part 1: Setup up a jekyll blog using github pages and disqus comments
- Part 2: Add social sharing buttons with Jekyll
- Part 3: SEO for your Jekyll blog
Part 1: Setup a personal blog with Jekyll
TL;DR :
You want to start a personal blog, keep it simple and have a nice visual result? In this article we will see how to set up a blog with jekyll, add a good looking theme, and host it on github pages
This is the first article of my blog, so it seems a perfect subject to explain how I set it up (and by the way, you are already seeing the final result, so if you don’t like it, you can skip this ;)
Why a static site generator?
There are several reasons to choose a static site generator instead of a CMS like Wordpress. In this article we will focus on the simplicity provided by Jekyll :
- Quick start (if you’re familiar with markdown you should be fine)
- Very little configuration
- Ease of deployment : no app server
- Ability to host directly on Github thanks to github pages
The list of alternatives is impressive, so why Jekyll?
- Right now Jekyll is one of the most popular static website generator (source)
- Used by Github (written by Tom Preston-Werner, founder of Github)
- The Ruby ecosystem
Choose a blog theme for Jekyll :
The default template is not great in terms of design. You can find nicer templates on jekyllthemes.org, for this blog I used clean-blog. To start your blog just fork the repo.
I advise you to change the default image on the front page and at the top of each post. You’ll find HD pictures under creative common license on stock-up.
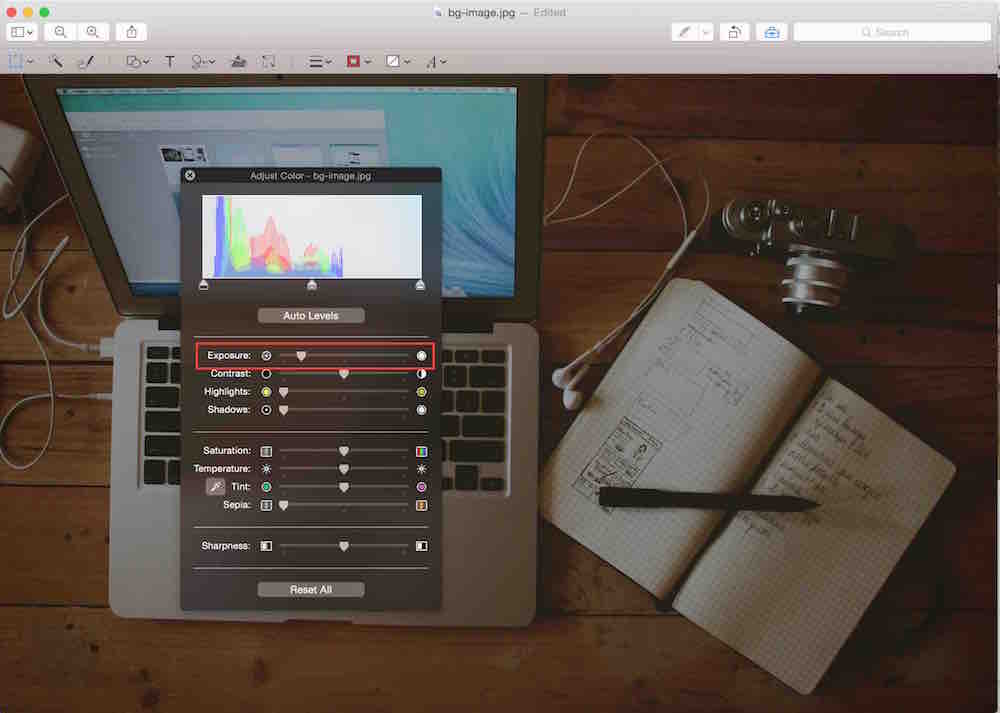
You’re going to display white text over the images, in order to increase readability it’s better to darken the image. You can do that with the mac preview app by changing the “exposure” :
To preview your modification locally, you must install Jekyll : see here, but basically it’s as complex as :
gem install jekyll
To start the jekyll server and add some posts, just follow the getting started
Deploy your Jekyll blog
To deploy your blog you can either :
1) Manually generate the static version of your blog:
jekyll build
It builds static HTML pages under the “_site” directory. Just serve this folder with the HTML server of your choice :
- Apache on a remote server
- Drop it on a S3 bucket (using S3 static website for example)
- Copy to your Dropbox public folder (no really, don’t do that..)
etc
2) Or you can use the hosting service github pages. Just create a repo using the following name convention :
your_github_username.github.io
Everytime you push the master branch, Github will automagically build a static version of your site and deploy it.
Add comments to your blog Jekyll with Disqus
To add a comments feature with Disqus, it’s just as simple:
- Create an account on Disqus
- Choose integration via “universal code”
- Include the provided code in the layout of the post (_layout / post.hmtl)
Send emails through the contact form
The clean blog template comes with a nice contact form, the only problem is that it relies on a PHP script for sending email. Github pages wont execute any PHP so it’s useless in our case.
There are many handy services that provides email forms for static websites, i chose formspree which is both simple and free.
I didn’t need anything fancy for the contact form validation, (only mandatory fields and email format check) so I removed jqBootstrapValidation and just used plain HTML5 validation.
The contact form uses Javascript to submit the form, i wanted to keep that so i just modified it to submit to formspree :
$(function() {
$("#contactForm").submit(function(e) {
e.preventDefault();
$.ajax({
url: "//formspree.io/my@email.com",
method: "POST",
data: $(this).serialize(),
dataType: "json",
success: function(data){
// Success message
$('#success').html("<div class='alert alert-success'>");
$('#success > .alert-success').html("<button type='button' class='close' data-dismiss='alert' aria-hidden='true'>×")
.append("</button>");
$('#success > .alert-success')
.append("<strong>Your message has been sent. </strong>");
$('#success > .alert-success')
.append('</div>');
//clear all fields
$('#contactForm').trigger("reset");
},
error: function(){
// Fail message
$('#success').html("<div class='alert alert-danger'>");
$('#success > .alert-danger').html("<button type='button' class='close' data-dismiss='alert' aria-hidden='true'>×")
.append("</button>");
$('#success > .alert-danger').append("<strong>Sorry it seems that my mail server is not responding. Please try again later!");
$('#success > .alert-danger').append('</div>');
//clear all fields
$('#contactForm').trigger("reset");
}
});
});
});Now you can send email without any backend !
That’s it.
See any way to improve this setup ? share your thoughts in comments
Code for this blog can be found here : vdaubry.github.io